
In my last post, I showed you about how to blink a LED light on Arduino but in this tutorial, I am going to show you the another simple way of blinking a LED light for Arduino.
◯What you need

2. A USB cable (Type A to B)

3. A Breadboard

4. A LED (5mm)

5. A Resistor (220ohm)


◯What you code
I code same as my previous tutorial.
|
1 2 3 4 5 6 7 8 9 10 11 12 |
int led = 13; void setup() { pinMode(led, OUTPUT); } void loop() { digitalWrite(led, HIGH); delay(1000); digitalWrite(led, LOW); delay(1000); } |
If you want to know the meaning of each line of the code, please check my previous tutorial out.
◯What you set up for the circuit
- You connect PIN 13 from Arduino to the longer leg of LED light (+) on the breadboard by using a wire.
- You connect the either side of the resistor on the breadboard to the shorter leg of LED light ( − ). In addition, the another side of the resistor should be inserted in minus sign (ground column) on the breadboard.
- You connect the GND from the Arduino to the ground column by using a wire.
◯The Circuit Schematic
This is the circuit schematic of our project. Like you see, the LED light is being connected to PIN 13. Also, the GND on the Arduino and the resistor is being connected each other through the breadboard.

◯The Result
By going through these things, you may be able to see the result like these pictures.
・When the LED light is turning off in 1000 milliseconds.

・When the LED light is turning on in 1000 milliseconds.
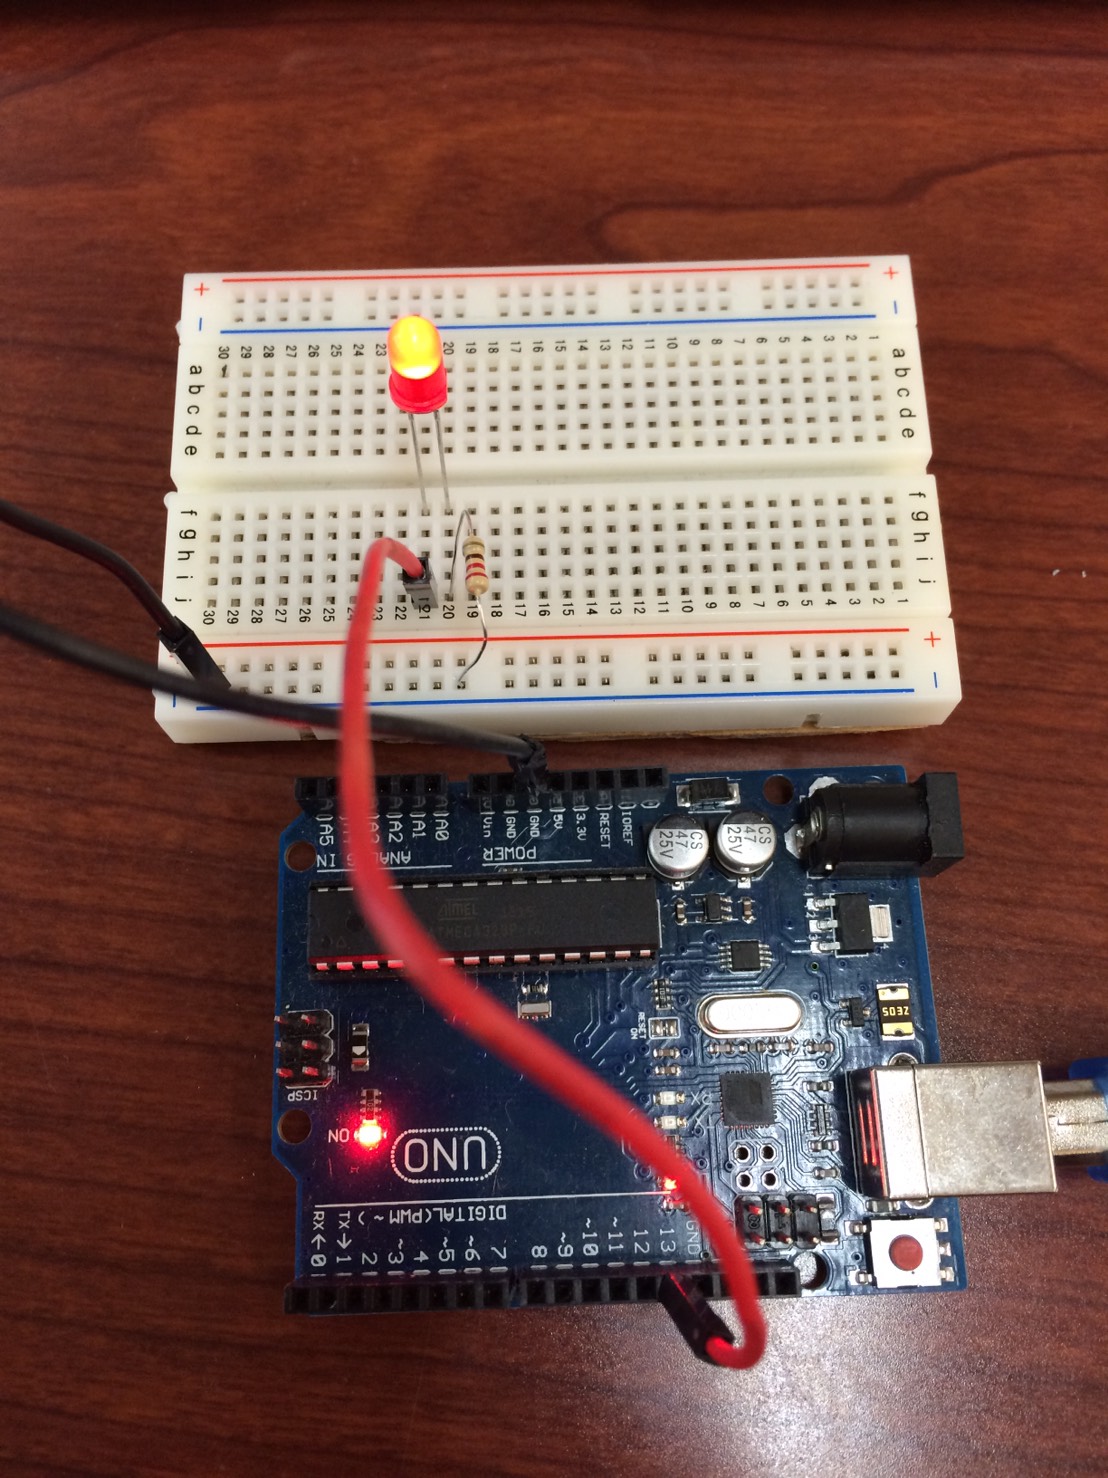
Well done! My programming and setting up could be working well! Could your LED light blink well?
Please let me know if you have any question about my simple tutorial!

